the story behind

Prologue
It all started from a curiosity,
Restoration (paint) is the same as painting on canvas for me, and as a painting object, the detail (neither the painting result, nor all the spare parts)
should be taken into account accurately. That is what i called : an art
At the beginning, i did to my bike as an experimental material (1975 Honda CB 125, no guts no glory), furthermore are diverse (depending on what is being favored, as you may see in this blog). No time limit was given, merely for my own pleasure at leisure (surely, i am not a professional restorer).

note :
Personally, i prefer the worst/rough condition of the objects (rather than a good looking one). These will gives much inhale at the beginning (challenge, yet low cost) and ‘extra' exhale at the last.
Besides that, this is to prove the extent of our ability in terms of restoration.
What about you ?

i have no knowledge, i’ll keep on learning
i have no skills, i’ll keep on trying
at least i still have curiosity

The Story Behind
(mainly for my japanese bikes only)

when there is a will, there are ways
better late than never

i did proved to my self those phrases
it was started when my buddy told me “it was too late” to start the project ! (many of its parts are already becoming collector items or expensive/exclusive things)
i’ll proved to him the true meaning of spirit
and i did (LOL)
but, the story behind it wasn’t smooth as it should be
first thing first, i state the concept :

the bike should back to its hey day as fresh from the dealer

these consequences using NOS parts is a must !
no time limit was given to the project (more or less 2 years to complete the project, due to difficulty of NOS parts available nowadays)
the only parts remains in use are the frame & crank case (with identification numbers), fuel tank (unbelievable price !), the rest of it : throw it away ! (donated) (this bike formerly in a very bad shape, with mixed of parts from other bikes ! From fenders, fuel tank, saddle, etc.)
hunting/searching/finding/trading NOS parts are the challenging part of this project ! (to get the lowest prices as possible !)
from authorized dealers to neglected small garage stations
from shinning parts to rubber parts
from the big parts to tiny parts
all are NOS ! yes New Old Stock ! or Nasty Old Shit ?
as you can see in this blog

while the hunting sessions begins, the body works was established
paint stripping was the first jobs, and this is one of the most pain staking job of all after that sanding, spraying and so on
detailing the fuel tank is tempting and challenging me
‘cause no pattern as guidance for me, just pic from the web
hence, i have to make sure (trial and error) the pattern is correct
and the result is : an exhale

this is the first time i did a painting on a bike/automotive

how to mixed the paint, sanding, spraying technique, etc just based on site experience
all the materials are common use for DIY
neither expensive/hi-tech paint materials nor complicated procedures to follow with
just basic painting procedures and common materials you’ll find within your area
except for the candy paint (uncommon color nowadays)

patience makes perfect & pay (more) attentions to the details

as you see in this blog, my finished/restored bike will not as ‘bright’ as you see if it not followed by detailing every single part (from obvious to hidden part) of the bike

by this blog, i would like to share my experience of how to restore a vintage/classic motorcycle (such as : painting, rendering a decal or maybe some useful tips from doing the job) which i’ll described it as simple as i can

last, i am just sharing (my experience), if it not works on you, i do (really) apologize, or at least you may learn from my mistake

thank you for visiting to my blog, and have a nice life
(so sorry for my bad english)

being underestimate is a good start to proved that we’re able to reverses the opinion

Epilogue
Other than the bike mentioned above, are awaiting 1973 Honda CB 100, 1976 Kawasaki G 7, 1977 Yamaha L 2 DX, 1967 Vespa VBC, 1977 Vespa small frame 90cc (to be restored), that can be seen on my flickr account at


For the non japanese bike (vespa, condor, etc.), restoration manly on the painting and repairing the parts, due to the difficulty/lack/price of its parts. The procedures are remain the same.

1967 Vespa VBC 150 restoration project

This VBC was neglected for almost 4 years.
Now, its time to pay more attention to this unique scooter 
I’ll make this scooter back to its hey day !
What i meant is : modest modification, and pay attention to the detail (like as always)

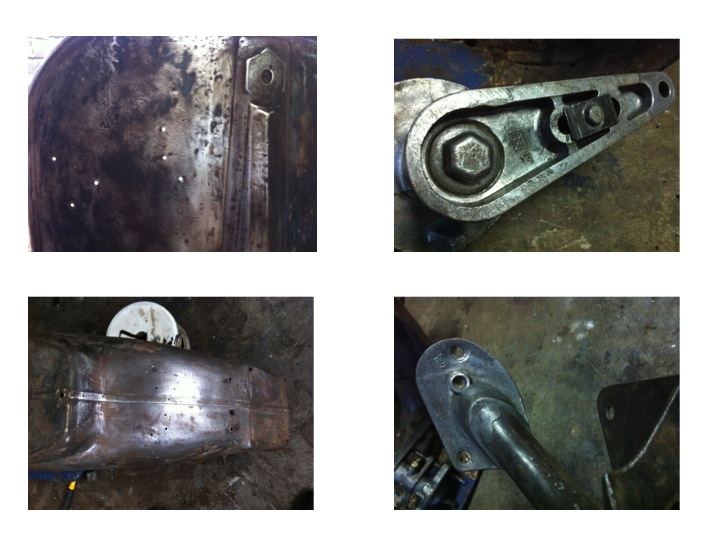
It has double deck (by previous owner), welded onto the original deck/floor pan.
The holes for logos (front/rear), the embossed (old) logo = definitely round headlamp !
The original front fender is cannot be repaired, NOS fender for the replacement.

to be continued …………


Honda Paint/Color Codes

A-01 Semi glazed black
A-03 Silver (labels)
A-07 Specified blue
A-73 Gold (labels)
B-100M-U Cosmo black metallic
B-104 Percian blue
B-143M Calypso blue metallic
B-175M Artico blue metallic
B-183M Petrol blue metallic
G-1 Smoke green
G-20 Papaw green
G-31 Mighty green
G-38M-S Muscat green metallic
G-142M Tasmania green metallic
G-156P Pearl sierra green
GA-1 Tomasek green
GY-102 Mint lime green
GY-120M Bud green metallic
GY-126 Matt uranium
G-142M Tasmania green metallic
G-177M Cyber green metallic
G-182M Sardegna green metallic
NH-1 Black
NH-1L Black
NH-1R Black
NH-1Z Black-Z
NH-2M Metallic silver
NH-4 Elephant gray
NH-10M Dark silver
NH-19M Dark gray metallic
NH-24 Ceramic white
NH-35M Cloud silver metallic
NH-42M-C Custom silver metallic
NH-43 Phantom black
NH-53L Spacy gray
NH-57 Excel black
NH-67L Dew gray
NH-101L Princess gray
NH-101M-U Perseus silver metallic
NH-104M-U Pleiadis silver metallic
NH-105 Matt black (#15-#20)
NH-106 Heatproof black
NH-110M-U Magnum silver (gray) metallic
NH-111 Cortina white
NH-118M-U Sterling silver metallic
NH-119M-U Tempest gray metallic
NH-121P Pearl shell white
NH-121P-A Pearl shell white A
NH-123L Midnight gray
NH-125M-U Nimbus gray metallic
NH-129M Max gray metallic
NH-131M Starlight silver metallic
NH-132M Max silver metallic
NH-138 Shasta white
NH-139P-A Pearl crescent white A
NH-142M-U Meteor gray metallic
NH-146M Accurate silver metallic
NH-154R Tasman gray
NH-167M-U Iron nail silver metallic
NH-182M Intellignet silver metallic
NH-193P Pearl crystal white
NH-193P-A Pearl ctystal white A
NH-196 Ross white
NH-206M Medium gray metallic
NH-211M Frame alumite silver metallic B
NH-217M Checker black metallic
NH-236M Sparkle frost silver metallic
NH-237P Pure black
NH-242MU Reddish gray metallic
NH-249 Mat works gray
NH-254M Blitz gray metallic
NH-259M Accurate seed silver metallic
NH-280 Armor black
NH-280R Armor black
NH-295M Sparkling silver metallic
NH-326P Pearl glacier white
NH-341 Pearl white
NH-347R Works gray
NH-359M Mute black metallic
NH-403M Brittany silver metallic
NH-411M Force silver metallic
NH-418P Pearl prism black
NH-431 Metallic silver
NH-436 Asphalt
NH-463M Darkness black metallic
NH-478M Tower silver metallic
NH-480M Shield silver metallic
NH-A12M Interstellar black metallic
NH-A13M Excalibur gray metallic
NH-A30M Digital silver metallic
NH-A32M Mat blac gray metallic
P-44 Illusion blue
PB-1 Dark blue
PB-2 Columbia blue
PB-2C-S Candy blue green
PB-3 Maruem blue
PB-3C-C Candy sapphire blue
PB-3c-F Flake sapphire blue
PB-5 Royal blue
PB-6C-S Candy sirius blue
PB-7C Candy sword blue
PB-11L Cabaret blue
PB-22B Dionysus blue
PB-31 Angel blue
PB-36L Reykjavic blue
PB-101 Matt blue
PB-106 Peppermint blue
PB-102C-S Candy grandeur blue special
PB-103C-C Candy radiant blue custom
PB-107C-U Candy tanzanight blue
PB-109 Neptune blue
PB-115C-U Candy flair blue
PB-117C-U Candy enpire blue
PB-120C-A Candy pearl blue
PB-123PA Pearl siren blue-A
PB-127C-U Candy Aleutian blue
PB-151C-U Candy mistral blue
PB-161C-U Candy wave blue
PB-164 Victory blue
PB-166 Wisteria blue
PB-171M-U Traditional blue metallic
PB-174P Pearl diana blue
PB-182 Florida blue
PB-184M-U Granite blue metallic
PB-186 Seychelle night blue
PB-200 Dakar blue
PB-215C Candy tahitian blue
PB-221M Cyclon blue metallic
PB-230M Sensitive blue metallic
PB-255P Pearl coronado (colorado) blue
PB-256M Northern light blue metallic
PB-257M Lapis blue metallic
PB-262P Pearl great blue
PB-284C Candy phoenix blue
PB-296M Moody blue metallic
PB-297M Sevilla blue metallic
PB-324C Candy xenon blue
PB-332P Pearl heron blue
PB-341P Pearl breezy blue
PB-342M North pole blue metallic
PB-346 Pearl blue
PB-351P Pearl montana blue
PN-299M Ice blue metallic
PN-342M North pole blue metallic
R-2 Scarlet
R-2C-F Flake sunrise orange
R-3C Candy red
R-4C Candy ruby red
R-6C-S Candy antares red
R-7C-C Candy ltd maroon
R-8 Bright red
R-8C-S Candy presto red
R-9C-S Candy alpha red
R-23 Tahitian red
R-33 Helios red
R-101C-U Candy glory red
R-103L Burning red
R-104C-U Candy muse red
R-107C-U Candy bourgogne red
R-109 Passion red
R-110 Monza red
R-112L Factory red
R-114 Candy dark red
R-114C-U Candy wineberry red
R-116 Stream red
R-117C-A Candy pearl red
R-119 Flash red
R-120 Blaze red
R-124C-U Candy Alamoana red
R-127 Sparkling red
R-131C-U Candy andromeda red
R-134 Fighting red
R-151C-U Candy graceful red
R-157 Italian red
R-158P Pearl pure red
R-147P Pearl rasberry black
R-167 Furious red
R-175 NR red
R-176C Candy spectra red
R-201 Magna red
R-247M Pennant red metallic
R-255M Rich red metallic
R-257C Candy ambassador red
R-258 Winning red
R-277C Candy calcutta red
R-287 Candy black cherry
R-296M Carnelian red metallic
RP-138M Mauritania violet metallic
RP-147P Pearl rasberry black
RP-152M British gold metallic
RP-166 Magenta metallic
Y-1 Ivory yellow
Y-31 Parakeet yellow
Y-124P Pearl shining yellow
Y-158M Siena gold metallic
Y-161M Navona beige metallic
Y-163 Yellow
Y-170M Cyber gold
Y-181 Titanium
YR-3C Candy kent brown
YR-26 Shiny orange
YR-129M Summer blond metallic
YR-147M Max brown metallic
YR-183M Titanium metallic
YR-196C Candy Orange
YR-217M Elegant beige metallic
YR-234M Exotic brown metallic

see my other finished/on going restoration project :
1975 Honda CB 125 Old Japanese Motorcycle Restoration Project (Candy Ruby Red R4C)
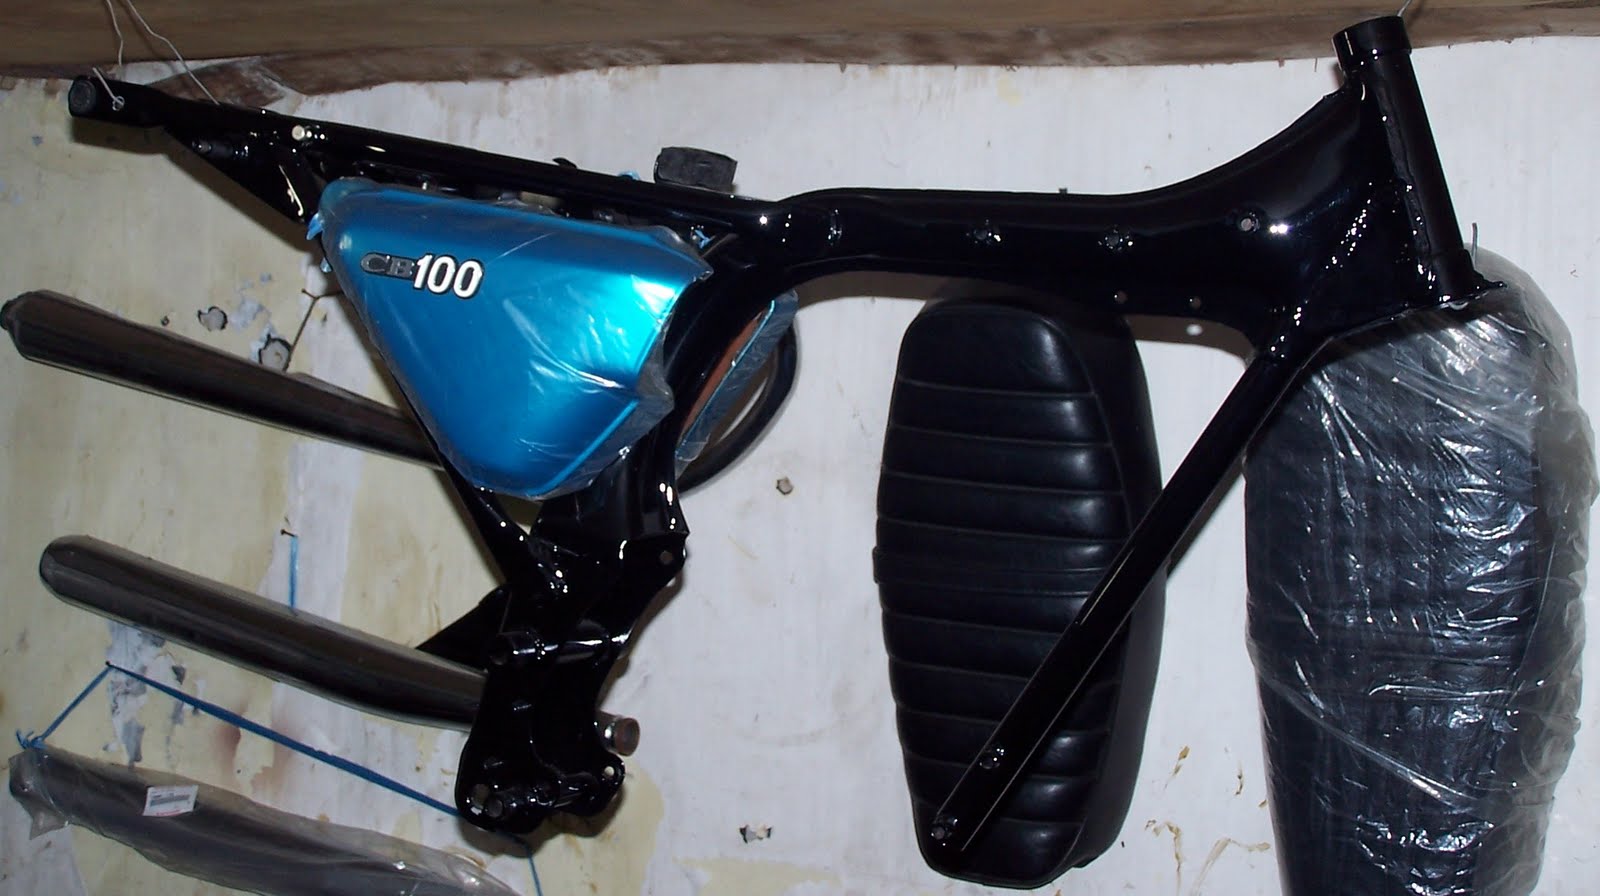
1973 Honda CB 100 mk 1 (Candy Blue Green PB-2C-S)(on going restoration project)
1973 Honda CB 125 (candy blue green PB 2C S) vintage japanese motorcycle restoration project
1973 Honda CB 100 mk 1 Fuel Tank Rendering (Candy Blue Green PB-2C-S)
Honda Paint/Color Codes
1977 Vespa Special 90, PTS, small frame, scooter restoration project
1967 Vespa VBC 150 restoration project
1951 Condor A 580 vintage heritage classic motorcycle restoration project

1973 Honda CB 100 mk 1 Fuel Tank Rendering (Candy Blue Green PB-2C-S)


this fuel tank is ready for finishing

1973 Honda CB 100 mk 1 (Candy Blue Green PB-2C-S)(on going restoration project)


this is my 3rd Honda of my restoration project
but, it has postponed for couple or triple years
all the (NOS) parts are ready from the beginning

1975 Honda CB 125 Old Japanese Motorcycle Restoration Project (Candy Ruby Red R4C), how to paint and rendering

property of & restored by saka matra

this is (my) first time of restoring a vintage motorcycle, and i am not pro !
(i don’t know neither spraying nor mixing a paint)
i meant : every body can do !
what we need is : a will !
and the rest we can learn while doing (believe me)
so, why don’t you start your own !

i have no knowledge, i’ll keep on learning
i have no skills, i’ll keep on trying
at least i still have curiosity

How to paint and rendering
Based on my experience (may or may not correct)

Step 1. Primary base paint
(starting from bare metal/plates)

1. Apply a primary base paint/epoxy (thick mixture) # observed the damages/defects
2. Sanding, gradually with sandpaper e.g. no. 240 - no. 320 *
3. Repair the severe damage with putty
4. Sanding, gradually with sandpaper e.g. no. 240 - no. 320 * as thin and even as possible
5. Apply a primary base paint/epoxy (thick mixture)# as straightening/fill in the subtle defects
6. Sanding, gradually with sandpaper e.g. no. 240 - no. 320 * as thin and even as possible
7. Apply a primary base paint/epoxy (thick mixture) # as straightening/fill in the subtle defects on a certain spots
8. Sanding, gradually with sandpaper e.g. no. 320 - no. 600 * as thin and even as possible
9. Observe the result. Repeated to its perfection. Ready for coloring.

Step 2.a.  for Solid paint
(starting from primary base paint and assuming the surface is already flat/even)

1. Apply base color e.g. blue/1st layer (thick mixture) # 
2. Sanding, gradually, slightly thin e.g. no. 800 - no. 1000 *
3.  Apply a primary base paint/epoxy (thick mixture) #  or putty (on the certain spots) as straightening/fill in the subtle defects 
4. Sanding, gradually, slightly thin e.g. no. 800 - no. 1000 *
5. Apply the blue color/2nd layer (rather dilute mixture) #  assuming there are no defects/is perfect
6. Sanding, gradually, slightly thin e.g. no. 800 - no. 1000 * 
7. Observe the result. Repeated to its perfection. Ready for finishing (jump to Step 4.b).

Step 2.b. for Candy paint
(starting from primary base paint and assuming the surface is already flat/even)

2.b.1. Light silver (as a basis for candy paint)

1. Apply the light silver/1st layer (thick mixture) #
2. Sanding, gradually, slightly thin e.g. no. 800 - no. 1000 *
3. Apply a primary base paint/epoxy (thick mixture) #  or putty as straightening/fill in the subtle defects on the certain spots (acceptable)
4. Sanding, gradually, slightly thin e.g. no. 800 - no. 1000 *
5. Apply the light silver/2nd layer (rather dilute mixture) #  assuming there are no defects/is perfect
6. Sanding, gradually, slightly thin e.g. no. 800 - no. 1000 * 
7. Observe the result. Repeated to its perfection (if needed). 
8. Ready for applying a candy paint 
9. Assuming do rendering first before candy paint (jump to Step 3) 
10. Cover up the finished decal, then (jump to Step 2.b.2), after that (jump to Step 4.a), finished

2.b.2. Candy paint (starting from light silver paint as basis for candy paint)

1. Apply a candy paint/1st layer (rather dilute mixture) # 
2. Sanding, gradually, slightly thin e.g. no. 800 - no. 1000
3. Apply a candy paint/2nd layer (more dilute mixture) # assuming there are no defects
4. Sanding, gradually, slightly thin e.g. no. 800 - no. 1000
5. Ready for final stage/finishing
6. Assuming there is no decal (jump to Step 4.b), finished

Step 3.  Rendering the decal
(assuming starting from finish color e.g. candy paint and clear coat has not been applied)

1. Sanding the allocation area of the decal (black as a base of the white lines)
2. Form the outline of black decal. make sure the proportion and the size of the decal is precise  ***
3. Apply an adhesive tape **** by follow the out side shape of the (black) decal
4. Cover up the fuel tank (excl. area to be painted) with non sticky materials (e.g. paper, plastic, etc.)
5. Apply the black color (rather dilute mixture) #
6. Sanding, gradually, slightly thin e.g. no. 800 - no. 1000 * assuming there are no defects **
7. Form the outline of the white lines decal, make sure the proportion and size is correct **
8. Apply an adhesive tape **** by following the out side shape of the white lines
9. Apply the white color (rather dilute mixture) # by using a proper spray gun e.g. an airbrush 
10. Repeated to its perfection (straight and smooth lines)

Step 4.a. Finishing glossy looks with certain (spot) polishing
(starting from candy paint with the decal has been applied)
(the decal should be covered before applying the last layer of candy paint)
(more difficult and complicated but likely to be implemented)

1. Apply a candy paint/3rd/final layer (more dilute mixture)  #
2. Sanding, gradually, slightly thin e.g. no. 1000 - no. 1500 * and polishing (only) on the intersection of both layer 
3. Finish

Step 4.b. Finishing glossy looks with clear coat and without polishing
(starting from candy paint with the decal has been applied)
(a lot more easier than Step 4.a)

1. Apply a clear coat/1st layer (rather dilute mixture)  #
2. Sanding, gradually, slightly thin e.g. no. 1000 - no. 1500 *
3. Apply a clear coat/2nd layer (more dilute mixture)  #
4. Finish

note :
Persistence sanding is the basic requirement to obtain good result
Impressed thin plates and “thin” sound when tapped is a must

* sandpaper density may vary and not necessarily the same as mentioned above
# mixture is depending on the needs. no definite ratio to be given as a reference
** unacceptable error, due to the character of candy paint. the thicker the layer, the darker the result
*** cannot be undo or reshape the decal
**** not too sticky, easily to bent/deflected, e.g. negative film tape, etc. 

(my) Spraying technique

I am using small size spray gun (K3) which aim to facilitate the movement, also to ease the fatigue
and i prefer the one with air pressure regulator below the handle (easily to adjust the air pressure while in use).

1. Distance (approximate +/- 30 cm, may vary), depend on
a. mixture
b. air pressure, intense of air pressure for long distance, or in reverse 
c. type of surface e.g. rounded, flat, wavy, wide, etc.
d. spraying angle, on which part spraying is intended e.g. corners/joints of the subframe, hidden surface, etc.

2. Air pressure (in scale of 1 − 100 %) : not more than 50 % of its capacity, depend on :
a. mixture
b. spraying angle
c. surface

3. Miscellaneous
a. Protect yourself /safety first, by using a mask to avoid a toxic gas, spray in an open room and use a fan if needed
b. Spraying should be steered clear of the finished area/spray forward
c. For a curved/circle/cylinder surface, air pressure should be regulated into medium (air) pressure,

25% up to 35% (quarter of 100% its capacity)


d. Start from the most difficult/hidden area (spotted area), and (the spray) outlet should be set into round shape/focused rather than overspread
e. Let the surface totally dry, then continue with the rest
f. Do sanding evenly (and do not avoid the hidden/difficult surface). 
if there is a shiny (even small or spotted) area means the surface still uneven (these will resulted a wavy, porous looks). repeat the sanding ’till the shiny area were vanished. 
g. Repeated to its perfection 
h. To prevent the result of being soggy :
h.1. (thick mixture) primary base/paint : hardener : thinner = 100 : up to 20 : up to 30 (approximate) 
h.2. Usage of Polyurethane material for primary base, paint, hardener or thinner is better (hard and durable). Some times, mixing of primary base with non PU thinner is allowed for fast dry as result
h.3.  Do not spray while it rain, night, or in a dark room, due to polyurethane character of slow dry at room temperature (assuming painting in an open space without proper equipment/DIY)
h.4. Do not dry up direct to the sun light, a warm and windy room it’s sufficient (dry evenly)
h.5. Each layer have to be awaited ’till totally dry 

That’s all folks,
and have a nice try 

All the ‘story’ above based on my experience, may or may not correct 

or at least you may learn from my mistake


1975 Honda CB 125 Old Motorbike Restoration Project (Candy Ruby Red R4C), how to paint and rendering


every single part were designed to its functions
so, follow the instruction from the dealer spare part list (breakdown pictures), which (easily) can be found on the web.property of & restored by saka matra


i have no knowledge, i’ll keep on learning
i have no skills, i’ll keep on trying
at least i still have curiosity

How to paint and rendering
Based on my experience (may or may not correct)

A. Primary base paint
(starting from bare metal/plates)

1. Apply a primary base paint/epoxy (thick mixture) # observed the damages/defects
2. Sanding, gradually with sandpaper e.g. no. 240 - no. 320 *
3. Repair the severe damage with putty
4. Sanding, gradually with sandpaper e.g. no. 240 - no. 320 * as thin and even as possible
5. Apply a primary base paint/epoxy (thick mixture)# as straightening/fill in the subtle defects
6. Sanding, gradually with sandpaper e.g. no. 240 - no. 320 * as thin and even as possible
7. Apply a primary base paint/epoxy (thick mixture) # as straightening/fill in the subtle defects on a certain spots
8. Sanding, gradually with sandpaper e.g. no. 320 - no. 600 * as thin and even as possible
9. Observe the result. Repeated to its perfection. Ready for coloring.

B. Coloring light silver
(starting from primary base paint and assuming the surface is already flat/even)
(light silver as a basis for candy paint)

1. Apply the light silver/1st layer (thick mixture) #
2. Sanding, gradually, slightly thin e.g. no. 800 - no. 1000 *
3. Apply a primary base paint/epoxy (thick mixture) #  or putty as straightening/fill in the subtle defects on the certain spots (acceptable)
4. Sanding, gradually, slightly thin e.g. no. 800 - no. 1000 *
5. Apply the light silver/2nd layer (rather dilute mixture) #  assuming there are no defects/is perfect
6. Sanding, gradually, slightly thin e.g. no. 800 - no. 1000 * 
7. Observe the result. Repeated to its perfection. Ready for applying a candy paint.

C. Coloring candy paint
(starting from light silver paint as basis for candy paint)

1. Apply a candy paint/1st layer (rather dilute mixture) # 
2. Sanding, gradually, slightly thin e.g. no. 800 - no. 1000
3. Apply a candy paint/2nd layer (more dilute mixture) # assuming there are no defects
4. Sanding, gradually, slightly thin e.g. no. 800 - no. 1000
5. Ready for final stage/finishing

D. Glossy looks with certain (spot) polishing
(starting from candy paint with the decal has been applied)
(the decal should be covered before applying the last layer of candy paint)
(more difficult and complicated but likely to be implemented)

1. Apply a candy paint/3rd/final layer (more dilute mixture)  #
2. Sanding, gradually, slightly thin e.g. no. 1000 - no. 1500 * and polishing (only) on the intersection of both layer 
3. Finish

E. Glossy looks with clear coat and without polishing
(starting from candy paint with the decal has been applied)
(a lot more easier than section C)

1. Apply a clear coat/1st layer (rather dilute mixture)  #
2. Sanding, gradually, slightly thin e.g. no. 1000 - no. 1500 *
3. Apply a clear coat/2nd layer (more dilute mixture)  #
4. Finish

F. Rendering the decal
(starting from finish color e.g. candy paint and clear coat has not been applied)

1. Sanding the allocation area of the decal (black as a base of the white lines)
2. Form the outline of black decal. make sure the proportion and the size of the decal is precise  ***
3. Apply an adhesive tape **** by follow the out side shape of the (black) decal
4. Cover up the fuel tank (excl. area to be painted) with non sticky materials (e.g. paper, plastic, etc.)
5. Apply the black color (rather dilute mixture) #
6. Sanding, gradually, slightly thin e.g. no. 800 - no. 1000 * assuming there are no defects **
7. Form the outline of the white lines decal, make sure the proportion and size is correct **
8. Apply an adhesive tape **** by following the out side shape of the white lines
9. Apply the white color (rather dilute mixture) # by using a proper spray gun e.g. an airbrush 
10. Repeated to its perfection (straight and smooth lines)

note :
Persistence sanding is the basic requirement to obtain good result
Impressed thin plates and “thin” sound when tapped is a must

* sandpaper density may vary and not necessarily the same as mentioned above
# mixture is depending on the needs. no definite ratio to be given as a reference
** unacceptable error, due to the character of candy paint. the thicker the layer, the darker the result
*** cannot be undo or reshape the decal
**** not too sticky, easily to bent/deflected, e.g. negative film tape, etc. 

G. (my) Spraying technique

I am using small size spray gun (K3) which aim to facilitate the movement, also to ease the fatigue
and i prefer the one with air pressure regulator below the handle (easily to adjust the air pressure while in use).

1. Distance (approximate +/- 30 cm, may vary), depend on
a. mixture
b. air pressure, intense of air pressure for long distance, or in reverse 
c. type of surface e.g. rounded, flat, wavy, wide, etc.
d. spraying angle, on which part spraying is intended e.g. corners/joints of the subframe, hidden surface, etc.

2. Air pressure (in scale of 1 − 100 %) : not more than 50 % of its capacity, depend on :
a. mixture
b. spraying angle
c. surface

3. Miscellaneous
a. Protect yourself /safety first, by using a mask to avoid a toxic gas, spray in an open room and use a fan if needed
b. Spraying should be steered clear of the finished area/spray forward
c. For a curved/circle/cylinder surface, air pressure should be regulated into low - medium (air) pressure, 
25% up to 35% (quarter of 100% its capacity)

d. Start from the most difficult/hidden area (spotted area), and (the spray) outlet should be set into round shape/focused rather than overspread
e. Let the surface totally dry, then continue with the rest
f. Do sanding evenly (and do not avoid the hidden/difficult surface). 
if there is a shiny (even small or spotted) area means the surface still uneven (these will resulted a wavy, porous looks). repeat the sanding ’till the shiny area were vanished. 
g. Repeated to its perfection 
h. To prevent the result of being soggy :
h.1. (thick mixture) primary base/paint : hardener : thinner = 100 : up to 20 : up to 30 (approximate) 
h.2. Usage of Polyurethane material for primary base, paint, hardener or thinner is better (hard and durable). Some times, mixing of primary base with non PU thinner is allowed for fast dry as result
h.3.  Do not spray while it rain, night, or in a dark room, due to polyurethane character of slow dry at room temperature (assuming painting in an open space without proper equipment/DIY)
h.4. Do not dry up direct to the sun light, a warm and windy room it’s sufficient (dry evenly)
h.5. Each layer have to be awaited ’till totally dry 

That’s all folks,
and have a nice try 

All the ‘story’ above based on my experience, may or may not correct 

or at least you may learn from my mistake